Building the Ultimate Gaming PC: A Step-by-Step Guide to Creating a Beastly Machine
Are you tired of playing games on a subpar computer that can’t keep up with the latest titles? Do you dream of a machine that can handle even the most demanding games at high frame rates and resolutions? Look no further! Building a gaming PC can be a daunting task, but with this step-by-step guide, you’ll be well on your way to creating a beastly machine that will take your gaming experience to the next level.
Step 1: Plan Your Build
Before you start building, it’s essential to plan your PC’s specifications. Consider the types of games you want to play, the resolution you want to play at, and the frame rate you’re aiming for. This will help you determine the components you need to purchase. Some key factors to consider include:
- CPU (Central Processing Unit): The brain of your PC, responsible for executing instructions. Look for a high-performance CPU with multiple cores (at least 4) and a high clock speed (at least 3.5 GHz).
- GPU (Graphics Processing Unit): The heart of your gaming PC, responsible for rendering graphics. Choose a high-end GPU with plenty of VRAM (at least 8 GB) and a high clock speed (at least 1500 MHz).
- RAM (Memory): The more RAM, the better. Aim for at least 16 GB of DDR4 RAM, but 32 GB or more is recommended for heavy gaming.
- Storage: A fast storage drive is essential for loading games quickly. Consider a high-capacity SSD (solid-state drive) with a fast read and write speed (at least 500 MB/s).
- Motherboard: The main circuit board of your PC, connecting all the components together. Look for a motherboard with a good power delivery system, plenty of USB ports, and high-quality audio capacitors.
Step 2: Choose Your Components
Now that you have a plan, it’s time to choose your components. Here are some recommendations:
- CPU: AMD Ryzen 9 5900X or Intel Core i9-11900K
- GPU: NVIDIA GeForce RTX 3080 or AMD Radeon RX 6800 XT
- RAM: Corsair Vengeance LPX 32 GB (2×16 GB) DDR4 3200 MHz
- Storage: Samsung 970 EVO Plus 1TB M.2 NVMe SSD
- Motherboard: ASRock X570M Steel Legend Micro ATX or ASUS PRIME Z590-A
Step 3: Prepare Your Workspace
Before you start building, make sure you have a clean and well-lit workspace. You’ll need:
- A screwdriver: A Phillips head screwdriver for removing screws and installing components.
- A Torx driver: For removing the CPU cooler and installing the motherboard stand-offs.
- An anti-static wrist strap: To prevent static electricity from damaging your components.
- A can of compressed air: For cleaning dust and debris from your components.
Step 4: Unpack and Prepare Your Components
Unpack your components and prepare them for installation. Remove any packaging materials, and gently wipe down each component with a soft cloth to remove any dust or debris.
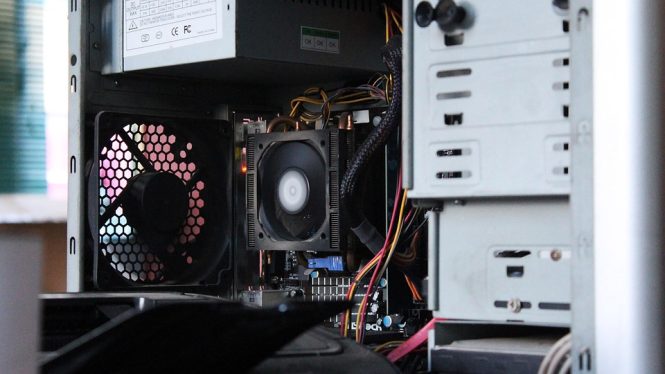
Step 5: Install the CPU and Motherboard
- Install the CPU: Carefully remove the CPU from its packaging and insert it into the socket on the motherboard. Apply a small amount of thermal paste to the CPU die (the top surface) and secure the CPU cooler.
- Install the motherboard: Place the motherboard on a flat surface and install the stand-offs. Secure the motherboard to the case using screws.
Step 6: Install the Memory and Storage
- Install the RAM: Locate the RAM slots on the motherboard and insert the RAM modules at a 45-degree angle. Secure them with the clips.
- Install the storage: Connect the SSD to the motherboard using a SATA cable and secure it to the case using screws.
Step 7: Install the Power Supply and Graphics Card
- Install the power supply: Connect the power supply to the motherboard and secure it to the case using screws.
- Install the graphics card: Locate the PCIe slot on the motherboard and insert the graphics card at a 45-degree angle. Secure it with screws.
Step 8: Connect the Front Panel and Fans
- Connect the front panel: Connect the power button, reset button, and LED indicators to the motherboard.
- Connect the fans: Connect the case fans to the motherboard or power supply.
Step 9: Install the Operating System
- Insert the installation media: Insert the installation media (USB drive or CD/DVD) and follow the on-screen instructions to install the operating system.
- Install drivers: Install the necessary drivers for your components, including the graphics card, sound card, and network card.
Step 10: Test Your System
- Power on the system: Plug in the power cord and press the power button.
- Run a stress test: Run a stress test to ensure the system is stable and functioning correctly.
Conclusion
Building a gaming PC can be a rewarding experience, but it requires careful planning and attention to detail. By following this step-by-step guide, you’ll be able to create a beastly machine that will take your gaming experience to the next level. Remember to choose high-quality components, follow proper installation procedures, and test your system thoroughly to ensure optimal performance. Happy building!